
Shower installations are straightforward plumbing projects but can get messy. The best way to avoid a mess is to plan. You should know what materials you need before you start. This guide will walk you through the process and help you avoid pitfalls.
Here’s how to do it right the first time:
Step one: Plan your shower installation
To install the perfect shower, you need to have a clear vision of your new bathroom fixture. Do you want a sleek and modern design or prefer something more traditional? The size of the room in which you’re installing your new shower also plays a role in determining what type of shower will work best.
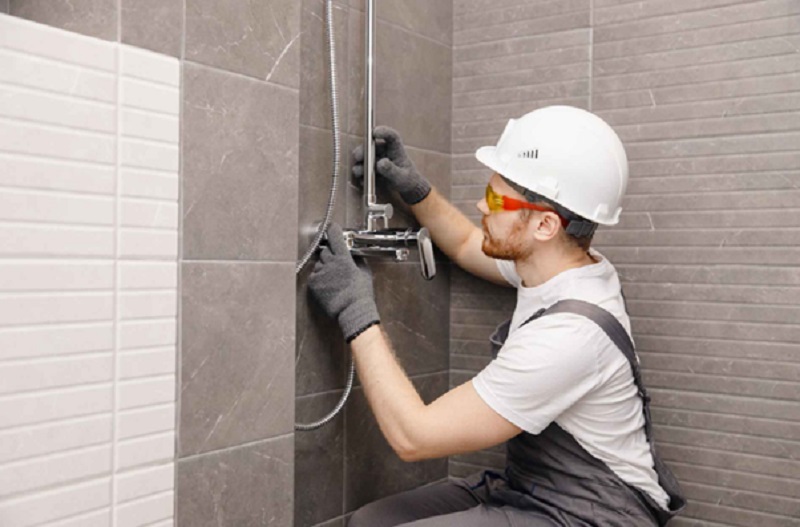
Step two: Choose a valve kit for your shower installation
Once you have the rough-in plumbing completed, it’s time to choose your shower valve. The type of shower valve you choose will depend on your new bathroom’s location and space requirements.
Shower valves come in many different styles: Diverter, pressure balance, dual flush, and high efficiency are all types of shower valves that work differently but share similar parts like handles and cartridges (the plastic piece inside).
The most important thing when choosing a shower valve is knowing what type of water pressure you will have coming into your home so that you can select a model that automatically adjusts its flow rate based on how hard or soft it’s running.
Step three: Install the valve
Once you’ve chosen which type works best for your home (and family), installing the valve is next. A wrench can tighten and secure it in place, but make sure to turn off the water first! You can also install a shower arm at this point.
When you’re done installing the new shower, could you turn on the water and test it out?
Step four: Attach the showerhead arm and flange
Once you’ve tested the water, it’s time to attach the showerhead arm and flange! It will give your new shower a secure place to sit.
Now that you’ve got the arm and flange attached to your showerhead, you must ensure its level. If not, your water will shoot everywhere as soon as you turn on the faucet.
To do this, start by placing a small caulk around where the arm meets your wall. Please wait for it to dry completely before moving on, so there’s no chance of leaks when you go back into test mode.
Step five: Finish plumbing and install the shower tray:
In this step, you’ll finish plumbing the shower and install the shower tray.
You must first hook the water supply from the wall to your shower head and faucet. First, connect the hot and cold water lines using flexible hoses (usually black). Then, attach them to the shower arm with a nut and bolt.
Step six: Tile preparation and installation
Now that you have the shower tray installed, it’s time to prepare your walls and floor for tiling.
First, use a grout saw or tile cutter to cut any tiles that don’t fit flush with the rest of the surface; then, use a tile nipper tool to remove any excess grout between each tile. Finally, ensure no gaps between them before applying a thin sealant layer over everything.
Step seven: Grouting and finishing up
Once your tiles are installed and sealed, you can add grout to any gaps between the tiles. Use a rubber float or a small putty knife to smooth the grout; wipe off any extra with a damp sponge. Once it’s dry, seal it again with another layer of sealant.
However, hiring a professional to do the job can often seem less complicated than trying to tackle it yourself. In addition, a professional will be able to handle any repairs or replacements needed, so there won’t be any issues in the future.
Conclusion
The shower installation process can be intimidating. But by following the steps outlined above, you will have your new shower installed and ready to enjoy in no time. First, you need to plan your installation; choose the valves kit, shower head, and other fixtures, and make sure you have the tools. Once you’ve done all this, your new shower will be ready.